Step-by-step guide to uploading scan images and videos into ScanHub: choosing which de-identified files to submit, uploading via My Scans, interpreting your scan, and submitting for review.
WHICH SCANS?
The very first step is to decide what images and videos you will upload. We recommend uploading:
Only de-identified files (no patient name or information)
A combination of still images and videos, with multiple files per “exam”
Make sure your images tell your story and submit a variety of scans, annotated if possible (i.e. if you were trying to prove that a clinical finding is or isn’t present – which images would you show?)
For primary care scan types, please make sure that your images include the minimum criteria needed to answer the sonographic images Only submit high quality images that are the best of your ability or will otherwise help you learn (e.g. you could submit an image you know is subpar and then indicate in comments “I know I only got a partial view of the gallbladder in image #2 but I’m not sure how to improve my technique”)
ONCE YOU HAVE DECIDED WHICH FILES TO UPLOAD:
1. Login and navigate to dashboard by hovering over the upper right corner

2. From the dashboard, click on the “My Scans” tab

3. On the menu to the left or the top of the page, click on Upload/Create Scan

4. You will see a box where you can drag scan files for upload or click to navigate through files and select one to upload. Please make sure each file is in one of the accepted formats and is not over 150mb
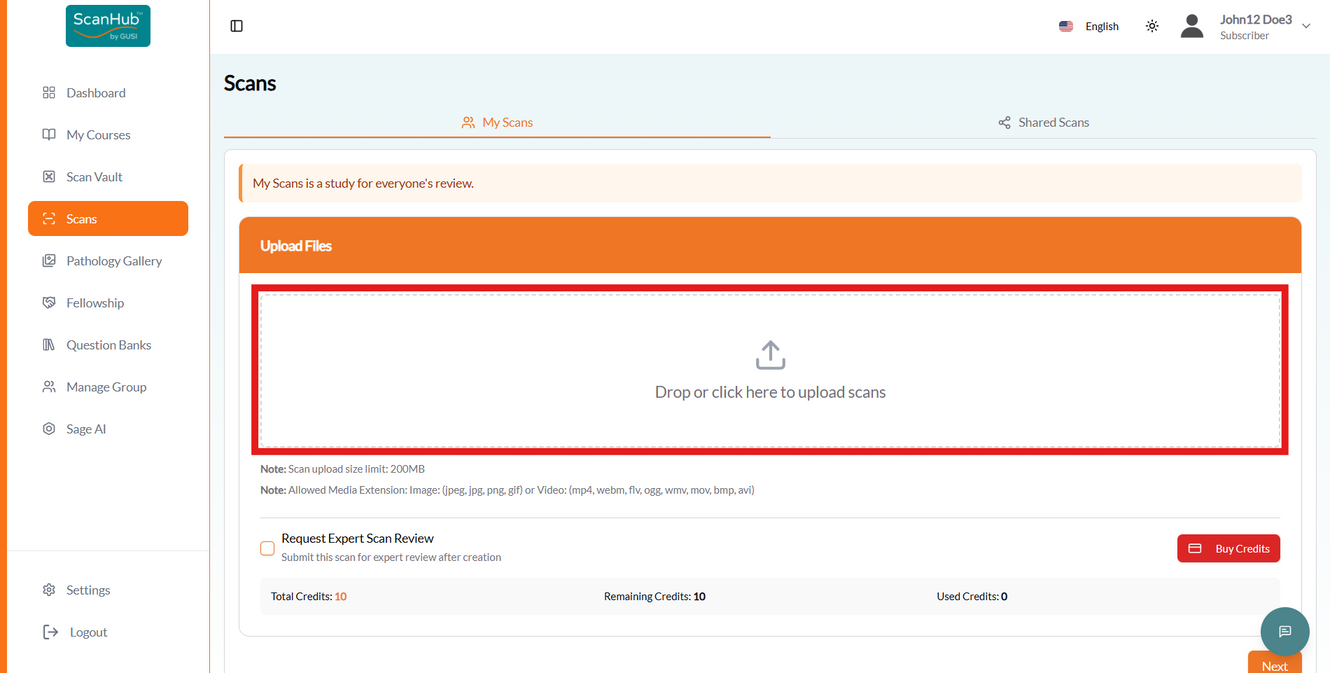
5. Once you upload files successfully they will appear on the screen. You can repeat dropping files or clicking to add files and upload as many as you will want for that exam.
Note: A “file” is an image or video. A “scan” is all the files associated with one patient in one encounter – for a second trimester OB scan, that might include pictures of the amniotic fluid, the placenta, the fetal position, and the heart rate, and a video showing there is only one fetus.
Once you have uploaded all the files that you want for the scan, click “next”

If you have slow internet and are running into issues with this step, try the following:
Try a different device or a different network Try uploading only one image at a time, clicking “submit”, and then clicking on “back” on the next screen, and returning to upload another image
6. Once you have clicked on “Next”, you will be directed to Interpret Scan. Once you have selected the scan type from the drop down menu, this will make the page transition to the submission form.

7. You will now be able to see your scans along with the submission form with scan interpretation. Fill out required fields for scan interpretation (scroll down on the page to see them all). Some may be pre-selected but you can change them. If the findings are “normal” they will appear as green and if “abnormal” they will appear as red. In the patient presentation & clinical question, you can put any scanning or technical issues you have and things you think it would be helpful for the reviewers to comment on. Click submit.

8. After clicking on the submit button, your Scan has now been successfully created.
You can choose to Go to Scan List, Go to Scan Details, or Create Another Scan.

9. If your fellowship includes GUSI scan review (as is standard), you can click the box that states “Request Expert Scan Review” during the file upload.
If you check this box, it will be reviewed by the GUSI team with detailed feedback and will be counted as one of your paid scans.

10. You can then click on “Scans” on the menu to the left.
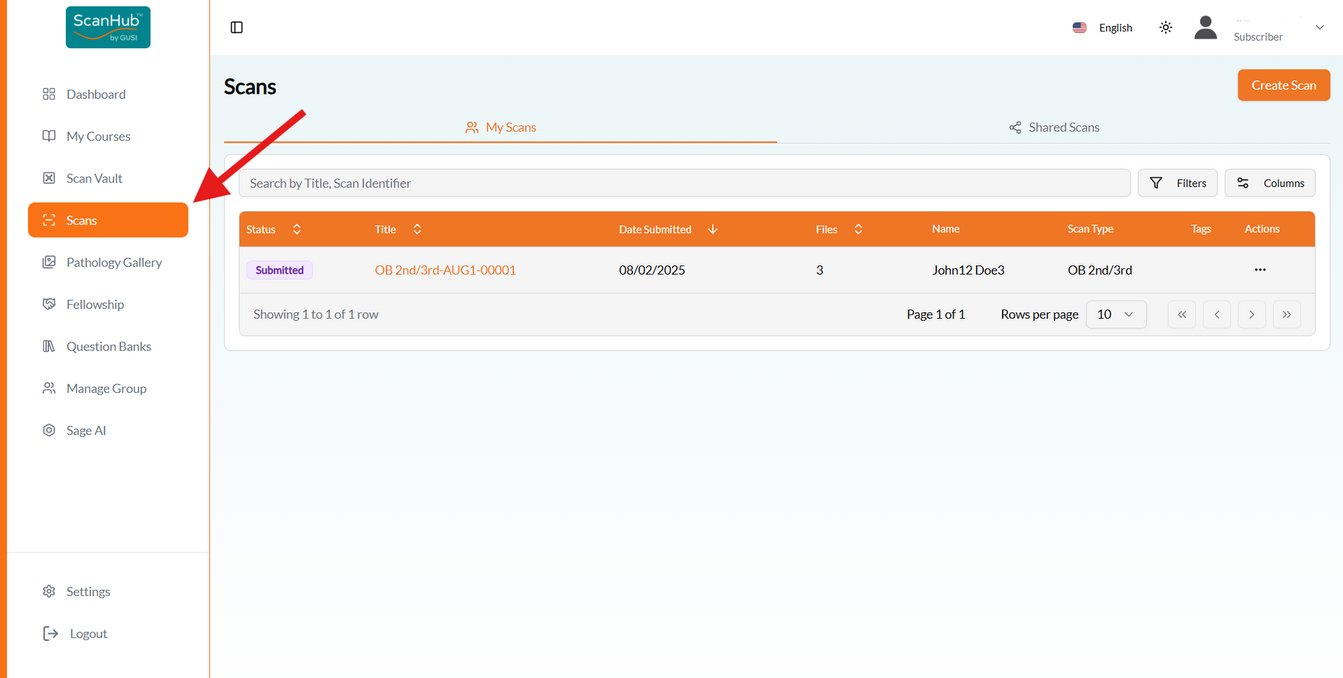
11. You will be able to see whether scans were properly submitted or are still in “draft" form at the left, and can view, email, or download scans at the right. You can click on the title of the scan to get back into the scan and submit any drafts later.

12. If you forgot to select “Request Expert Scan Review” during the file upload and have already submitted your scan, you can click on the — button on the right side of the submitted scan and make a request.

13. Make sure you have enough credits in your account.
You can buy credits by clicking on the “Buy Credits” button in the Credit Information section.

14. Request Expert Scan Review once you have enough credits.

15. Once your scans have been reviewed (usually within 72 business hours of submission) you can navigate to “reviewed” to read the detailed feedback.
